


Quick/Easy Civic/Integra Trailing arm bushing replacement (also ES Poly Vs. Mugen)
Page 1 of 1

Quick/Easy Civic/Integra Trailing arm bushing replacement (also ES Poly Vs. Mugen)
![]() by R13NGY Fri Nov 09, 2012 7:59 pm
by R13NGY Fri Nov 09, 2012 7:59 pm
I've been having some severe issues with my rear stepping out under hard cornering at HPDE's. My rear would step out wide and abruptly before my tires even started to complain (very exciting at Roebling Road at 70 MPH). JDogg suggested that my ES poly trailing arm bushings may be binding, so Friday evening before I went to VIR I replaced them with Mugen hard rubber bushings. I took some pictures and thought I'd share:
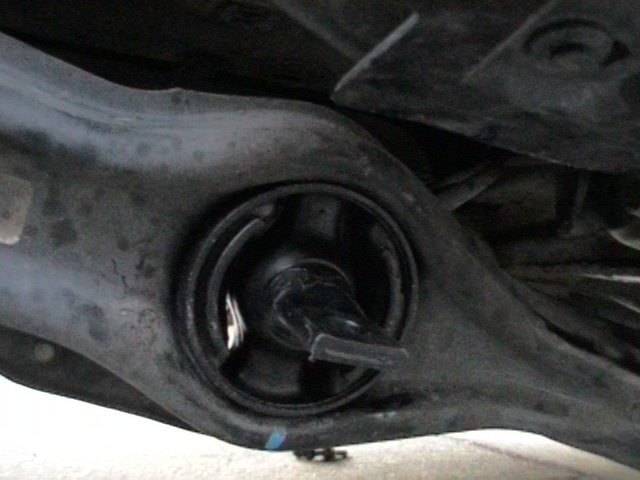
In case you don't know, the trailing arm is what your rear suspension pivots on, here is a pic showing it, the brakes bolt on to the back of it
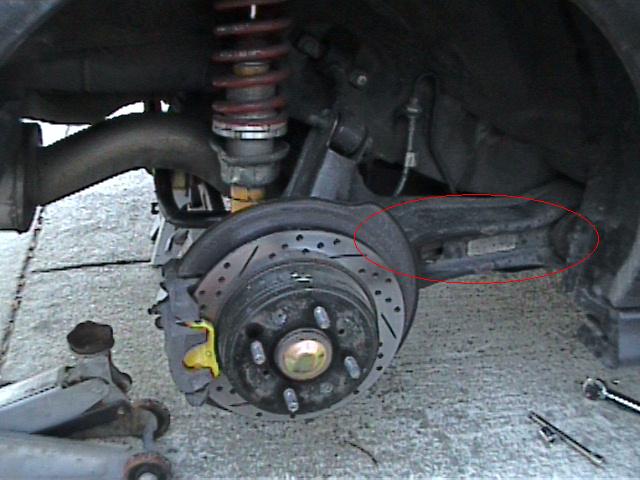
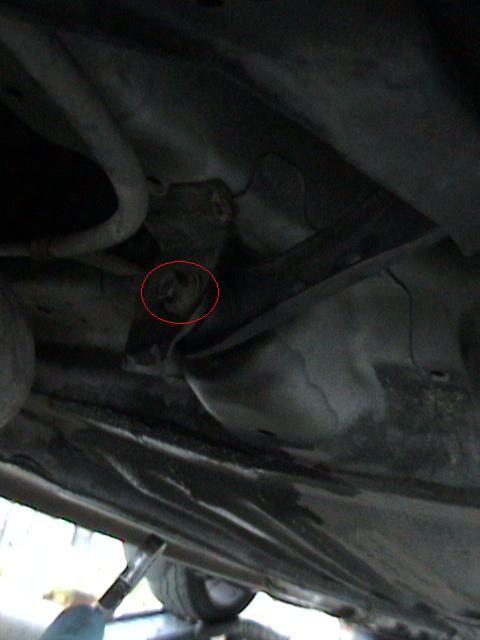
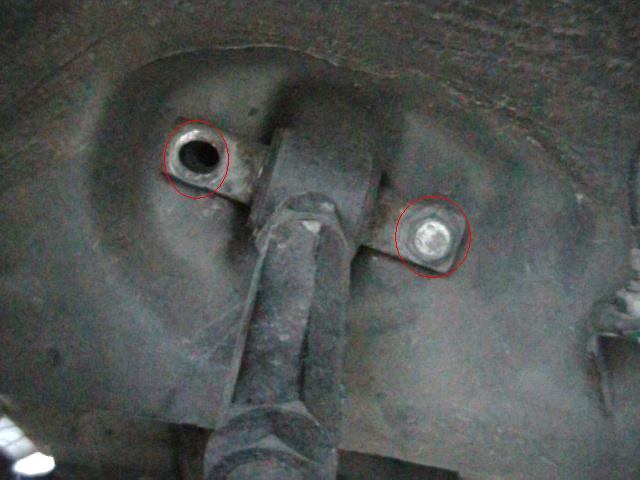
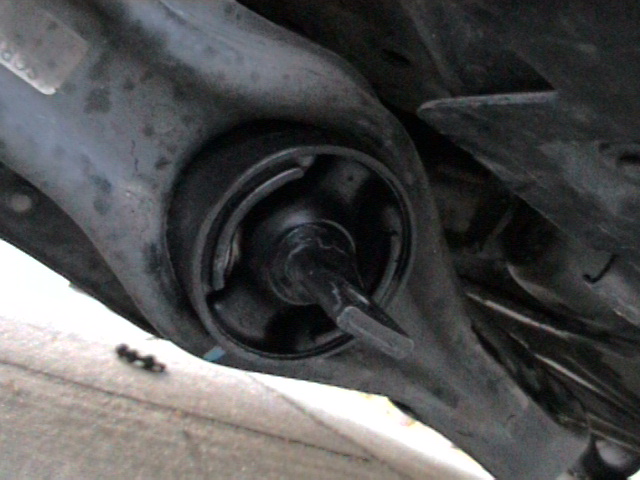
Here's a pic of the other end, I circled the ES poly bushing that I'm replacing:

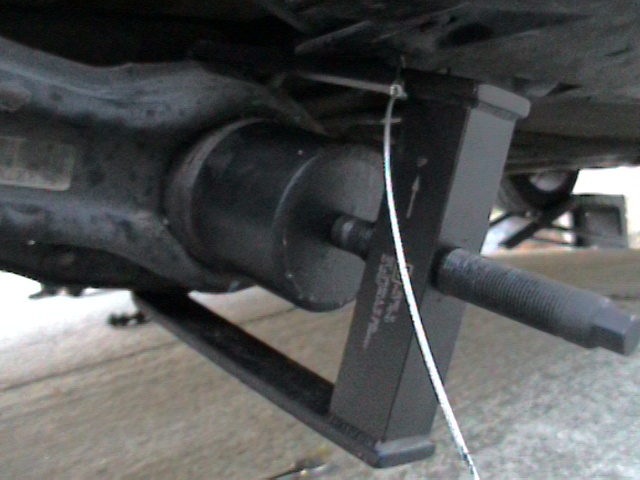
Here's the tool you will need if you want to DIY, otherwise you have to remove the trailing arms and take them to a machine shop:
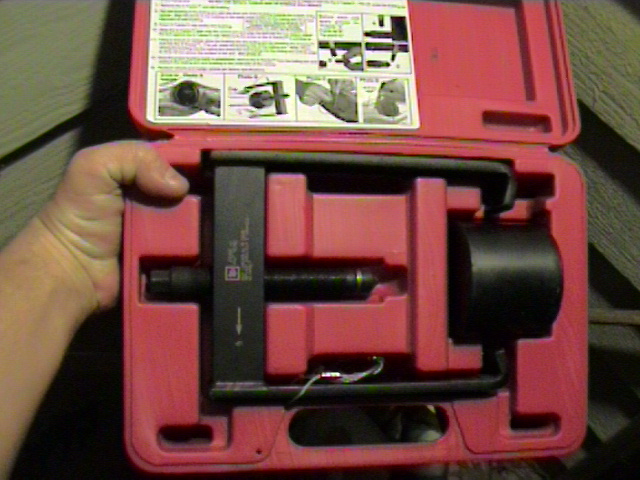
You can buy it from Skyway Tools for $169 shipped, (or if your from the UK contact risky_devil on this forum for discounted tools) they were great to deal with and shipped the tool the same day that I ordered it. Here's a link:
http://shoptoolsshoptools.com/shopexd.asp?id=2784
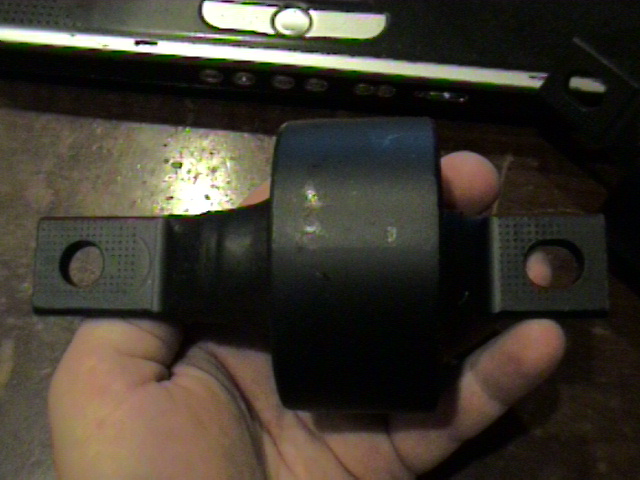
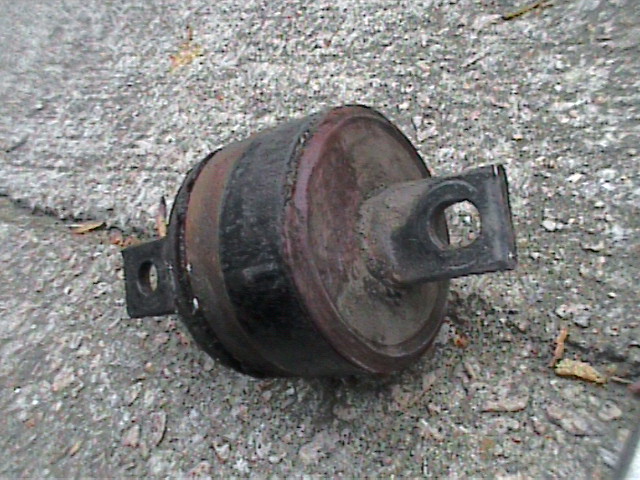
Here are the Mugen bushings, they look exactly like OEM Honda bushings and probably are, but they only cost $40 more, so I took a chance that they were inproved in some way over OEM:
You'll need to measure a couple of things before you remove the bushings, because they need to be installed to the same depth and clocked correctly or they will be twisted under normal driving and will probably not last as long.
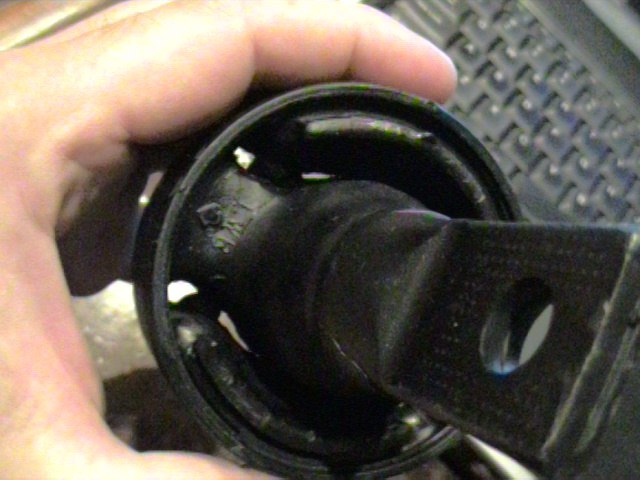
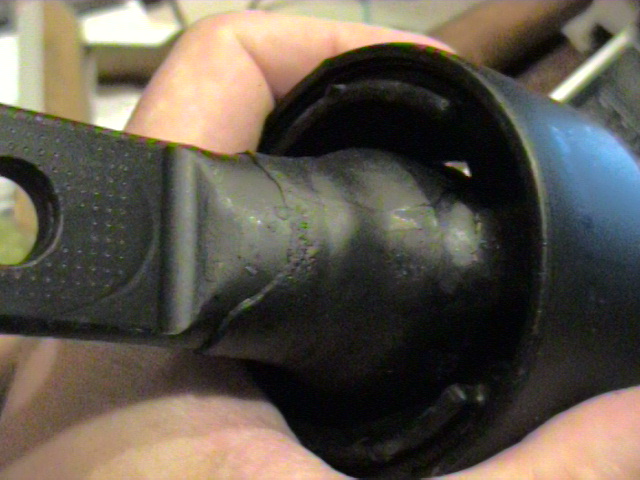
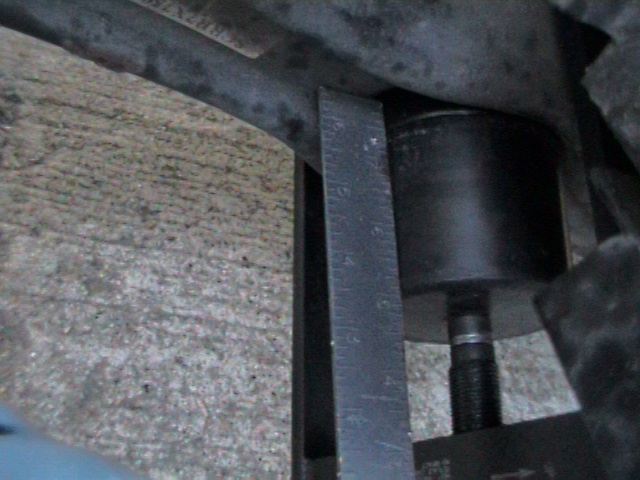
First you have to clock them, and it must be done with the car sitting on level pavement on all 4 wheels, just like it normally sits. I'm going to show a picture of me clocking it with the suspension dropped because that's the only way you can see what I'm doing (I have no lift, did this in the driveway), but when you clock yours you will have to reach up under there and do it by feel. I just put a metal ruler on the flat part of the tab on the center metal shaft of the bushing and used it to draw a line with a Sharpie on the trailing arm. When you install the new bushing, rotate it so that the ruler lines up with the line when you put it on the same place on the new bushing.
Here's a picture of the ruler on the tab:

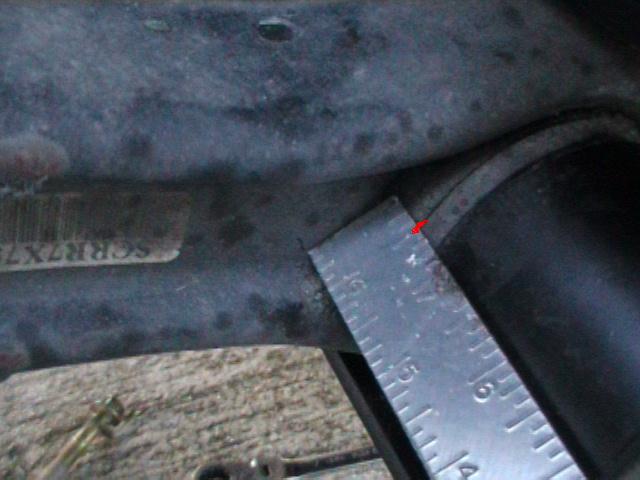
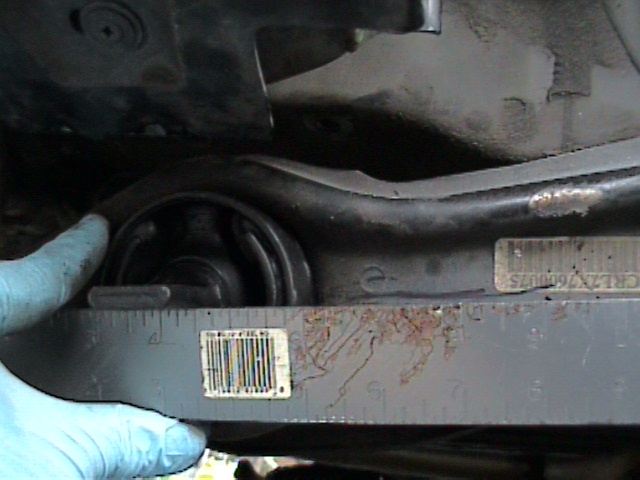
Next you measure how far the bushings are in the hole, I just used a ruler and measured to the edge of the metal bushing housing from the trailing arm (I MS Painted a red line on it to show where to measure to). Mine had just under .5" of metal sticking out of the hole. Make sure you press in the new ones just to where the old ones were (in my case, just under .5" out of the hole).
Now it's time to take it off, you will need to jack up the rear of the car and remove the back wheels. Make sure you chock the front wheels and support the back of the car on jackstands:

Now you need to remove five bolts, first the toe adjustment bolt. Before you loosen this bolt, mark where it is in it's hole with a Sharpie, because if you don't put it back in the exact same spot then it will mess up your alignment.
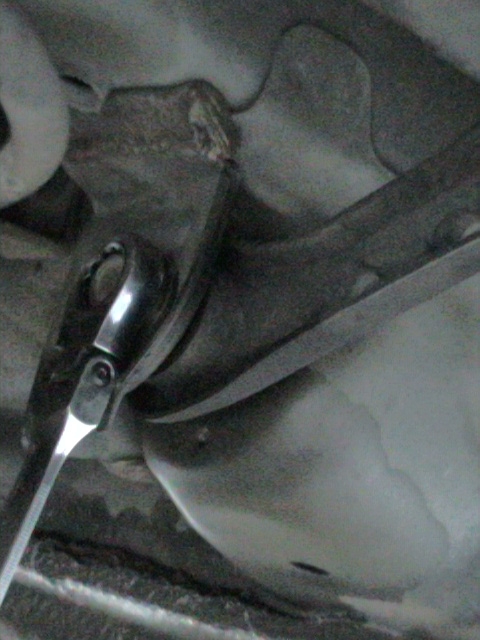
Here's the bolt, it's on a little metal arm that's all the way at the front of your trailing arm
I removed mine with a ratcheting wrench:
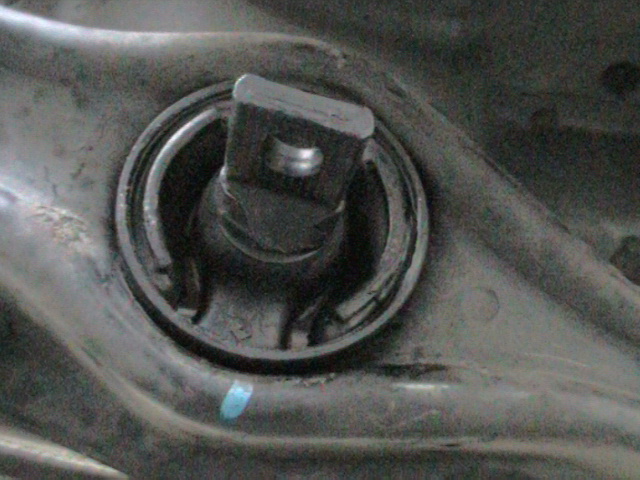
Next remove the two bolts in the center metal shaft of your trailing arm bushing. Here's a picture of the bolts looking up at the middle of the trailing arm from the bottom:
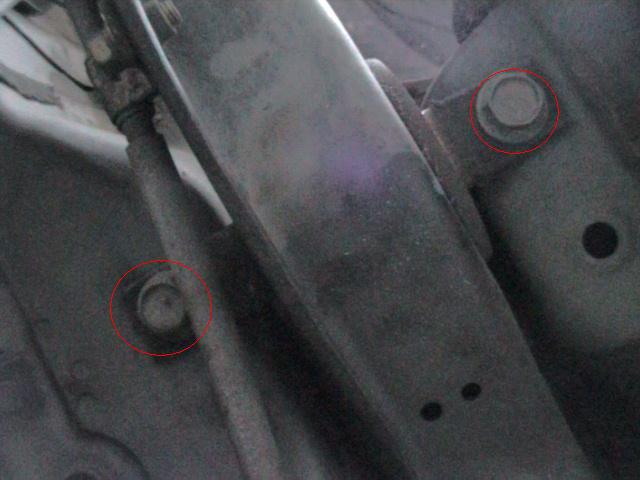
the trailing arm will hang down a bit, let it hang.
Next remove the bolts in the small upper arm, yours may look different from mine (mine are the camber-adjustable aftermarket kind), but they have the same two bolts that hold them on the car. Here are some pictures (I had already removed one of the bolts when I took the picture):
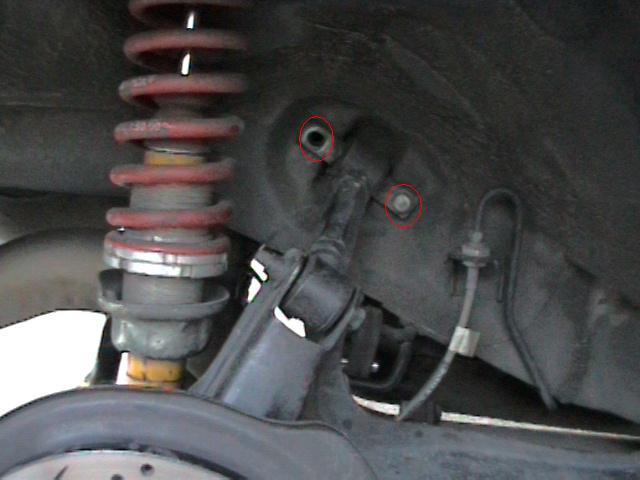
Now the arm will hang down under the car almost enough to get the bushing tool on it. You can prop it down with a piece of wood, of I just stuck my foot in there to hold it down to put the tool on it.
You hook the hooks on the tool around the edges of the trailing arm over the bushing (it is asymmetrical, so pay attention to the arrow that tells you which side is supposed to be pointing up), then place the cup over the bushing and ratchet the bolt on the tool down to push the bushing out of the control arm:
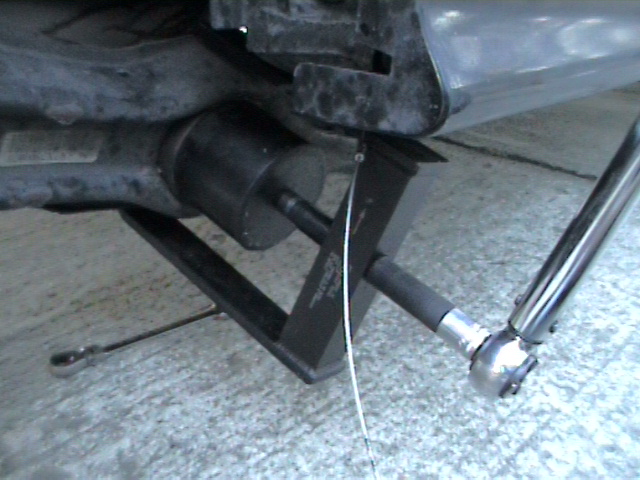
The bushing eventually drops out of the other side, just make sure it doesn't get behind the emergency brake cable and push it over too far
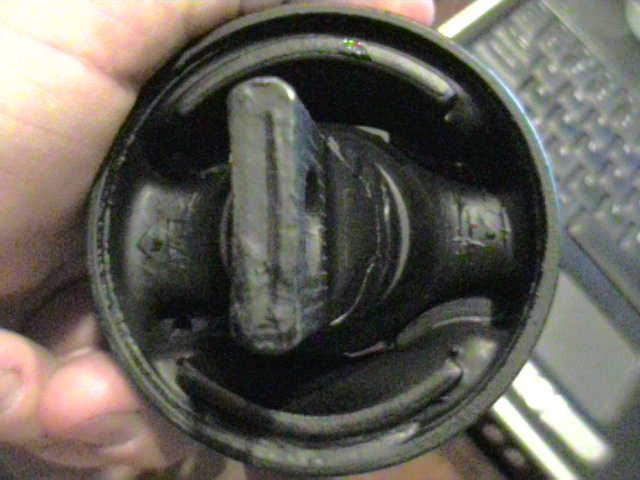
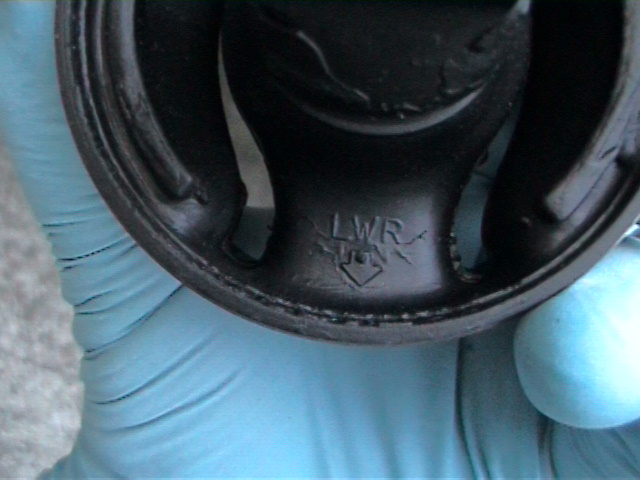
Clean up the hole a bit (I used brake cleaner and a rag), then seat the new bushing in the hole by hand. The bushing is directional, so make sure the bottom side, marked with the letters "LWR" and an arrow, is on the bottom:
Next make sure the new bushing is aligned to the mark you made on the trailing arm:
With the bushing seated solidly by hand, put the tool with the cup over the new bushing, then turn the bolt to push the bearing into the trailing arm, exactly like you did earlier to remove the old bushing

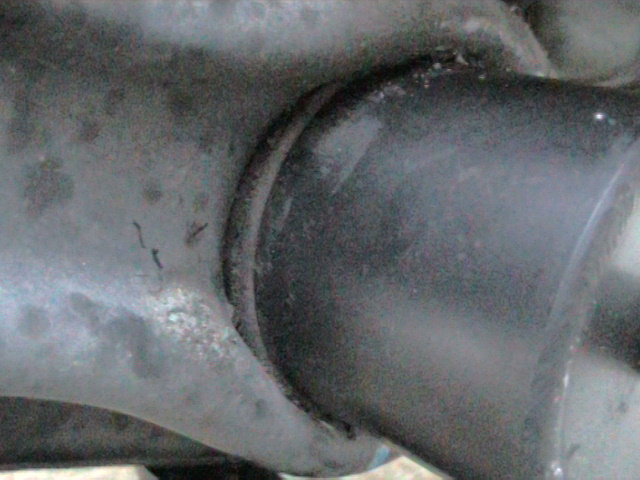
Push it in until it is in the hole the same amount as the original bushing:
Now you've got it in there, just like new:
It bolts back together in the reverse order of how it came apart, just make sure to tighten down the toe adjustment bolt in the exact same position that it was in originally or your alignment may be off.
This took me about an hour, but would take a lot less time if I did it again, the tool is really quick and easy to use.
The new bushings made a huge difference at VIR, it was like I had a different car. The rear is much more stable and no longer steps out. I was able to push the car much harder than I previously could, it was really amazing.
In case you don't know, the trailing arm is what your rear suspension pivots on, here is a pic showing it, the brakes bolt on to the back of it
Here's a pic of the other end, I circled the ES poly bushing that I'm replacing:
Here's the tool you will need if you want to DIY, otherwise you have to remove the trailing arms and take them to a machine shop:
You can buy it from Skyway Tools for $169 shipped, (or if your from the UK contact risky_devil on this forum for discounted tools) they were great to deal with and shipped the tool the same day that I ordered it. Here's a link:
http://shoptoolsshoptools.com/shopexd.asp?id=2784
Here are the Mugen bushings, they look exactly like OEM Honda bushings and probably are, but they only cost $40 more, so I took a chance that they were inproved in some way over OEM:
You'll need to measure a couple of things before you remove the bushings, because they need to be installed to the same depth and clocked correctly or they will be twisted under normal driving and will probably not last as long.
First you have to clock them, and it must be done with the car sitting on level pavement on all 4 wheels, just like it normally sits. I'm going to show a picture of me clocking it with the suspension dropped because that's the only way you can see what I'm doing (I have no lift, did this in the driveway), but when you clock yours you will have to reach up under there and do it by feel. I just put a metal ruler on the flat part of the tab on the center metal shaft of the bushing and used it to draw a line with a Sharpie on the trailing arm. When you install the new bushing, rotate it so that the ruler lines up with the line when you put it on the same place on the new bushing.
Here's a picture of the ruler on the tab:
Next you measure how far the bushings are in the hole, I just used a ruler and measured to the edge of the metal bushing housing from the trailing arm (I MS Painted a red line on it to show where to measure to). Mine had just under .5" of metal sticking out of the hole. Make sure you press in the new ones just to where the old ones were (in my case, just under .5" out of the hole).
Now it's time to take it off, you will need to jack up the rear of the car and remove the back wheels. Make sure you chock the front wheels and support the back of the car on jackstands:
Now you need to remove five bolts, first the toe adjustment bolt. Before you loosen this bolt, mark where it is in it's hole with a Sharpie, because if you don't put it back in the exact same spot then it will mess up your alignment.
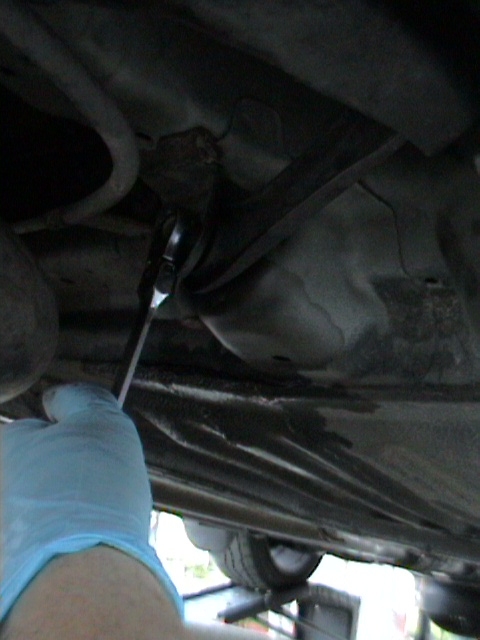
Here's the bolt, it's on a little metal arm that's all the way at the front of your trailing arm
I removed mine with a ratcheting wrench:
Next remove the two bolts in the center metal shaft of your trailing arm bushing. Here's a picture of the bolts looking up at the middle of the trailing arm from the bottom:
the trailing arm will hang down a bit, let it hang.
Next remove the bolts in the small upper arm, yours may look different from mine (mine are the camber-adjustable aftermarket kind), but they have the same two bolts that hold them on the car. Here are some pictures (I had already removed one of the bolts when I took the picture):
Now the arm will hang down under the car almost enough to get the bushing tool on it. You can prop it down with a piece of wood, of I just stuck my foot in there to hold it down to put the tool on it.
You hook the hooks on the tool around the edges of the trailing arm over the bushing (it is asymmetrical, so pay attention to the arrow that tells you which side is supposed to be pointing up), then place the cup over the bushing and ratchet the bolt on the tool down to push the bushing out of the control arm:
The bushing eventually drops out of the other side, just make sure it doesn't get behind the emergency brake cable and push it over too far
Clean up the hole a bit (I used brake cleaner and a rag), then seat the new bushing in the hole by hand. The bushing is directional, so make sure the bottom side, marked with the letters "LWR" and an arrow, is on the bottom:
Next make sure the new bushing is aligned to the mark you made on the trailing arm:
With the bushing seated solidly by hand, put the tool with the cup over the new bushing, then turn the bolt to push the bearing into the trailing arm, exactly like you did earlier to remove the old bushing
Push it in until it is in the hole the same amount as the original bushing:
Now you've got it in there, just like new:
It bolts back together in the reverse order of how it came apart, just make sure to tighten down the toe adjustment bolt in the exact same position that it was in originally or your alignment may be off.
This took me about an hour, but would take a lot less time if I did it again, the tool is really quick and easy to use.
The new bushings made a huge difference at VIR, it was like I had a different car. The rear is much more stable and no longer steps out. I was able to push the car much harder than I previously could, it was really amazing.
R13NGY- Posts : 12
Join date : 2012-11-09
» Integra rear seat preface ek foam
» 1" ITR MC/BB into Civic install
» DA6 Integra XSI (Oldschool B Series Rareness) picture Extremely Heavy
» Honda Civic EG6 SIR-II
» Coilovers for Civic EJ/EK
» 1" ITR MC/BB into Civic install
» DA6 Integra XSI (Oldschool B Series Rareness) picture Extremely Heavy
» Honda Civic EG6 SIR-II
» Coilovers for Civic EJ/EK
Page 1 of 1
Permissions in this forum:
You cannot reply to topics in this forum